Install the 32 bit or 64-bit build of NetSim depending on your PC platform.

Based on the NetSim version under installation the version type being displayed in the following windows will change. For example, you will see NetSim Standard for a standard version install –
Click on the Yes button to install the software.
Setup prepares the installation wizard and software installation begins with a Welcome Screen. Click on Next button to continue with the installation.

The license agreement will be displayed. Read the agreement carefully, scroll down to read the complete license agreement. Click on the I Agree button else quit the setup by clicking the Cancel button.

If you agree with the license agreement, you will be prompted to select either one of the installation options, Express (Single-click installation) or Custom (Step-by-Step installation).
Express Installation will install the third-party tools silently along with NetSim without displaying any prompts for the user.
Custom Installation is a step-by-step approach in which a user will be prompted to carry out the installation process and the same applies to the installation of the third-party tools which happens alongside with NetSim.
Both the installation methods are explained below:
Choose the Express (Single click) option and click on the Install button.

Express Installation:
NetSim installation starts and users can see that the third-party tools are getting installed one by one silently.

After the third-party installations, NetSim installation further proceeds. Once it is completed, NetSim complete Setup wizard appears as shown below. Click on Finish button to complete the installation process of NetSim.

Custom Installation:
Choose the Custom (Step-by-step) option and click on the Install button.

Now the user will be prompted to select the components to be installed. The list of components is available for selection and assembly only in the Standard and Pro versions of NetSim. NetSim Academic version is available as a single package.
Note: In Standard and Pro Versions of NetSim, the Choose Components screen will display only those components for which the licenses are obtained by the user. Also, Network Emulator and Real Time Protocol are available as Add-On along with NetSim.

Note: Select all the supporting applications for complete installation of the software as shown below:
Click on the Next button.

Note: Sumo and Python come only as a part of Standard and Pro Version Install.
In the next screen, you will be requested to enter the installation path. Select the path in which the software needs to be installed and click on the Next button.

Note: In the case you are installing 32bit NetSim in a 64-bit machine, ensure that the path is <OS installed drive> C:/Program Files (x86)/NetSim/Standard_v13_0.
In the next screen, you will be requested to enter the Start Menu folder name. By default, it shows NetSim Standard for Standard version install of NetSim. Click on the Install button to start the installation.

The installation process begins.

After the installation of required NetSim files, the installation of third-party tools begins.
For NetSim Academic Version, Adobe Flash Player, WinPcap, Wireshark will be installed.
For NetSim Standard and Pro Versions, along with WinPcap and Wireshark installation, Python installation will start automatically. (If not deselected during 3rd party software selection)
Click on Next button to start Wireshark installation.

Make sure that all the components are selected and click on Next button.

Click on Next button.

Select the path in which Wireshark needs to be installed and click on Next button.

Select Install Npcap 0.995 and click on Next button.

Select Install USBPcap 1.3.0.0 and click on Install button.

The installation process begins.

Npcap License Agreement window appears. Click on I Agree button.

Installation Options window appears. Click on the Install button.

Once the installation is completed successfully, click on the Next button.

You will get the Npcap Setup Finished window. Click on the Finish button.

USBPcap Driver License Agreement window appears. Click on I accept the terms of the License Agreement check box and click on Next button.

USBPcap CMD License Agreement window appears. Click on I accept the terms of the License Agreement check box and click on Next button.

USBPcap Setup Installation window appears. Click on Next button.

Select the path in which USBPcap needs to be installed and click on Install button.

Once the installation is completed successfully, click on Close button.

The Installation Complete dialog box appears once the installation process is completed successfully. Click on the Next button.

You will get the Wireshark Completing Setup window. Select the option I want to manually reboot later and Click on Finish button.

NetSim Standard Setup Installation proceeds further.

Note: During the installation of NetSim Academic version, the supporting software installed is WinPcap.
SUMO Set Up installation wizard appears. Click on Next button to continue with Sumo installation.

SUMO License Agreement window appears. Click on I accept the terms in the License Agreement checkbox and click on Next button.

Select the path in which SUMO needs to be installed and click on Next button.

SUMO Install Set Up window appears. Click on Install button.

SUMO Installation begins.

Once the installation is completed, click on the Finish button.

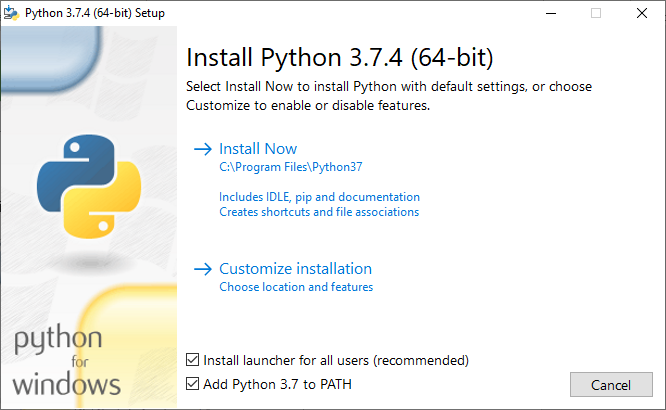
And then, Install Python 3.7.4 (64-bit) window appears. To start Python software installation, click on Install Now option.
Python installation begins.

A Setup was successful message will be displayed. Click on Close button.

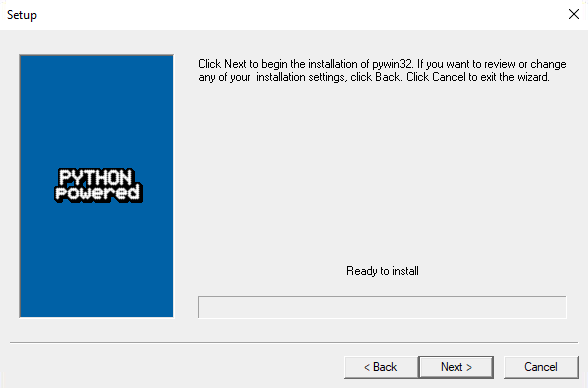
This will take you to the pywin 32-224 installation wizard. To install Pywin32, Click on Next button.

Select the Python directory and Click on Next button.

The Setup is ready to install. Click on Next button.
Pywin32 installation begins.

Once Pywin installation is complete, click on Finish button.

This completes the Installation of python software. NetSim complete Setup wizard appears as shown below. Click on Finish button to complete the installation process of NetSim.

After this, to run NetSim, double click on the NetSim icon present on the desktop or right-click and choose Run as administrator option. A NetSim License Server Information screen appears to start with NetSim.

Enter the NetSim License Server IP Address, i.e. the system in which the License files are present and the rlm.exe file is running. (To set up NetSim License Server - Refer to Section 2.3.1 – Installing NetSim RLM Dongle Driver Software (Dongle Based Licenses).) Click on the OK button. Once this is done, the NetSim Home screen will appear.
Note: During the installation of the NetSim Academic version the supporting software installed are Adobe Flash player and WinPcap.